Showing posts with label Canvas. Show all posts

Wednesday, September 20, 2017

Birthday Owl Canvas.

Hi everyone Vicki-Ann here for the Helmar Creative Team today. Recently my daughter had her birthday and every year I make her a small owl canvas instead of a card. 


First I painted my background using 3 different Acrylic colours and a palette knife blending to get some variations in colours. I added clouds and the big flower adding white painted highlights. 


Using the papers that I have on my desk I cut the owl shape and added that using the Helmar Decoupage and Craft Paste and the paint and glue spreader. I add the Helmar Decoupage and Craft Paste to the back of the paper and to the canvas and then spread out any bubbles. Once this was dry I added painted wings adding layers of paint to try and match the papers on the body. I added circles of the vintage book paper with more of the Helmar Decoupage and Craft Paste  I then thought he needed a beak so cut some more paper for the beak. Once it was all dry I added eyes and painted the eyelids in a skin tone colour.  


Once everything is dry I love to add tiny details and doodles. Mainly just squiggles and lines filling in with my Signo Uniball pen in white. I like to leave it all overnight to dry thouroughly then I add 3 coats of the Helmar Crystal Kote Picture Varnish Matte Spray This seals it and keeps it from fading.  My daughter loved her and I gave her a small wooden easel so it could sit on the shelf.

Have a great day 
Vicki-Ann :)

Sunday, July 16, 2017

Follow Your Heart

Recently for the Helmar Creative team I made a small canvas using some scrap papers and my favourite Helmar Decoupage and Craft Paste for the collage background. To see even more details pop over to the Helmar Creative Team page.


I covered my canvas with torn scrap papers, I just choose some that appeal to me. I have been given a few random pieces of different papers as gifts with letter journals that I have received. So this has some of those included, it was really nice to be able to use them in this project.


Using the Helmar Decoupage and Craft Paste and the glue spreader. I added glue to the canvas and the back of the paper and then use the glue spreader to ease out any bubbles. This gives you a great smooth finish.


Then I added some Decoart paints in 3 different shades of blue and Gesso. Then added some stencilling with the Crafter workshop chicken wire stencil.


While this was drying I worked on the layers. I used some Gesso on the hessian and the gauze to blend them together a bit. Then used some Helmar Tacky Craft Glue to stick them together. For the Heart I used some Helmar Decoupage and Craft Paste and glued it on to some cardstock to give it strength. Then I cut it into a heart shape and added a little plasterers tape, gesso and paint. I also painted another sheet of book paper so that I could stamp the words on it for my saying.


To add all the layers on top of my background I first placed it all together without glue and then took a photo to see if it looked right.


Then when I pull it off to glue it all on, I have a reference to know where my layers went and what order I wanted them to be. I have learned this is a great step when working on layers as otherwise you might not get the placement were you want it to be. You can look at your photo and go yep that is right. I wanted all of my postage stamps showing from the background so that is why I was a bit fussy with where I wanted it to be placed.


I wanted the plasterers tape on the background then the hessian and gauze layer. I glued these together with Helmar Tacky Craft Glue. Remember to pop some of the Helmar Tacky Craft Glue over the plasterers tape even though it is sticky you will still need to put some of the Helmar Tacky Craft Glue on it. It dries clear so you wont see it. I spread it around over it. Next is the heart layer that I have used the Helmar Tacky Craft Glue to pop the torn stamped words on.


When I stuck the heart on top using the Helmar Tacky Craft Glue I noticed that I had a bit more dimension than I thought. So I used some of the Helmar Liquid Scrap Dots wonderful stuff that. I just raised the bits up that needed the extra dimension and squeezed the Helmar Liquid Scrap Dots on the parts that needed it. It was under the ends of the words and the tips of the heart.


Have a great day
Vicki-Ann :)

Wednesday, December 14, 2016

Helmar

I was live on Periscope doing some Gelli printing on some deli paper and I loved the way this print turned out with the flowers. It was so pretty so I decided to use it in the background to make a small canvas for my Helmar Creative Team project. You can find more details and list of products used over on the blog at Helmar Creative team.


On Sunday I was live on Periscope doing some Gelli printing on some deli paper and I loved the way this one turned out with the flowers. It was so pretty so I decided to use it to make a small canvas. 


I used the Helmar Decoupage and Craft Paste and spread it over the canvas panel with the paint and glue spreader. Then placed my deli paper print over the top and used the paint and glue spreader to get any air bubbles and lumps out. 

I painted some music paper with some Gesso then painted the background with some Decoart paints using the paint and glue spreader. Then I stamped the Tim Holtz butterfly stamp on top of that. I put that on top of some canvas material using some Helmar Tacky Craft Glue waited for that to dry and then sewed it on the side with black cotton on my sewing machine. 


I threaded some twine through the wooden letter banners. Then tied some bows through 2 buttons to hold my banner at the sides. I used the Helmar Scrap Dots on the back of the buttons, as it was over the top of the twine so with the dimension this worked great. 


Using Helmar Tacky Craft Glue I placed my sewed butterfly panel on top of my canvas.


Any time I do a canvas I always finish it off with 2 coats of  Helmar Krystal Kote Matte Varnish 
this protects it from dust and fading and keeps it from yellowing. 
Have a great day
Vicki-Ann :)

Friday, July 8, 2016

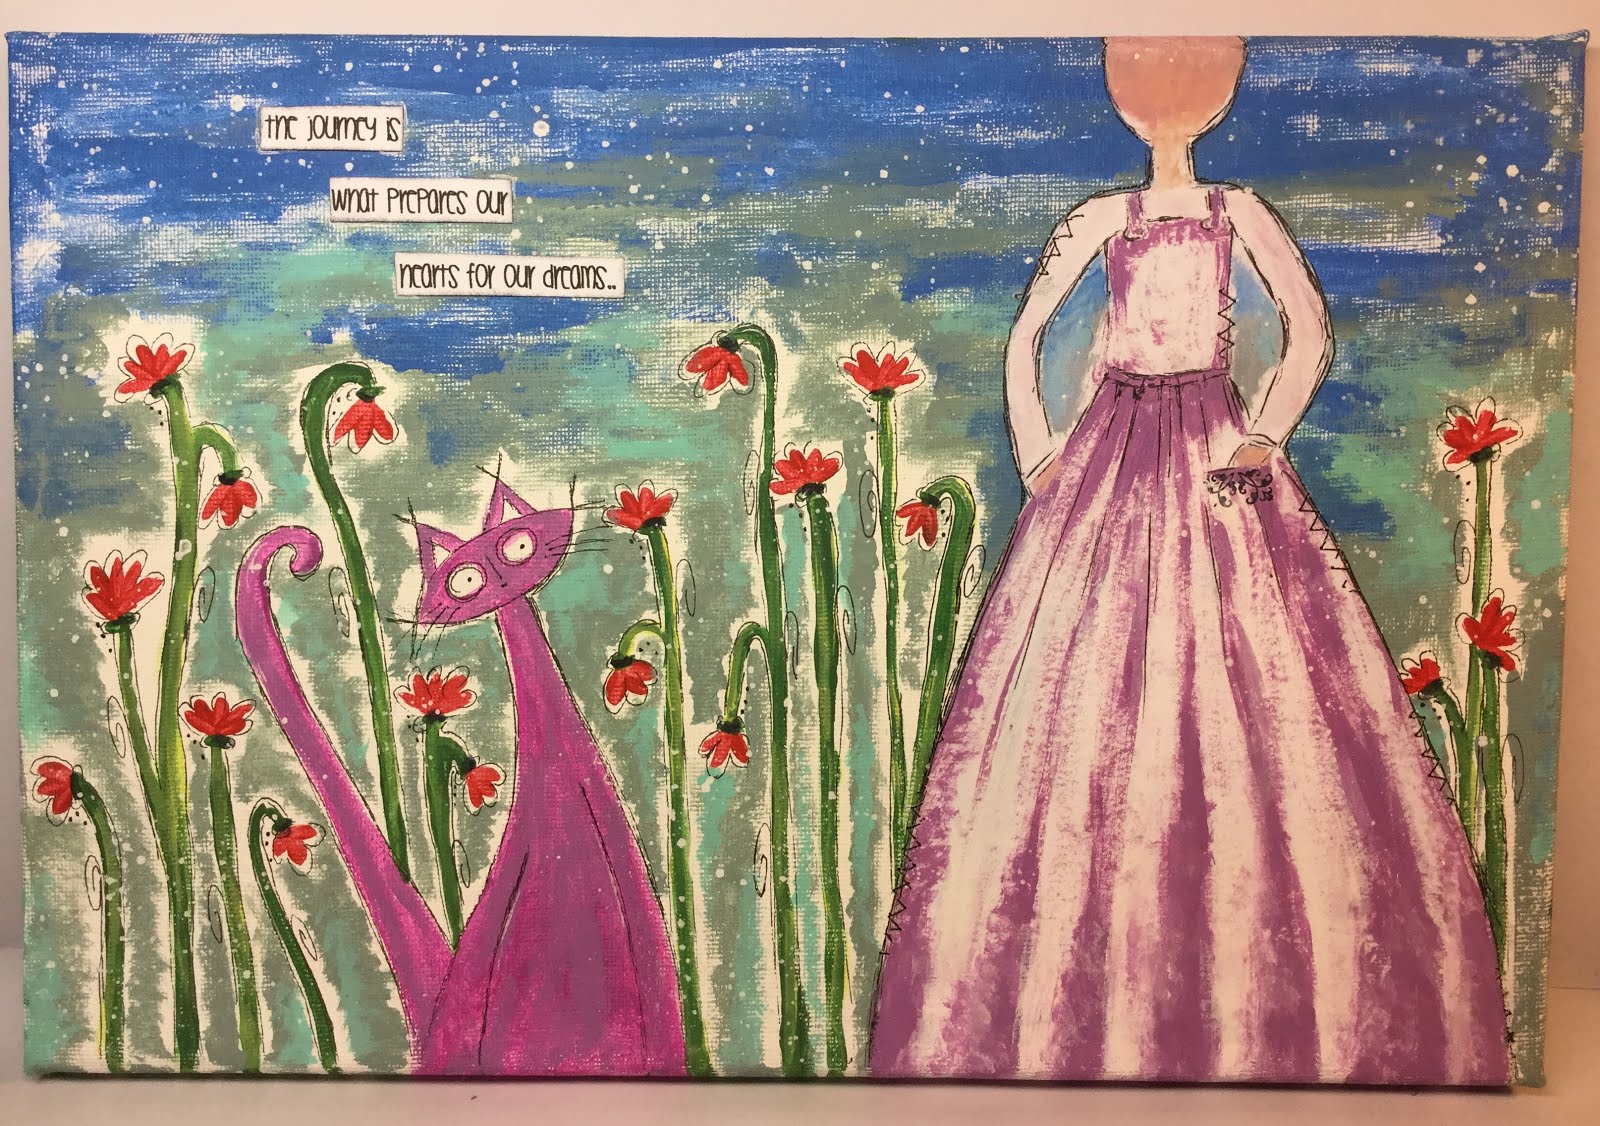
A Girl and her Cat...

Today for the Helmar Creative Team and I go into more details over there.  I re-created an art journal page that I had recently done and I really liked the colour and design of and thought it would be nice to have it on my wall in my art room.


I have not changed this much, but I did not just want to have a copy from my printer on my wall. I liked the way the girl looked with her dress. I had no problem with painting the cat or the flowers again as I have been doing those a lot. I just liked the shape of the girl and the way the dress looked. So thought I would copy her on my printer from my art journal and pop her on the painted background. So I painted the whole background of the spread again on a canvas with the cat. I just used the same DecoArt paints and blended the colours the same way.

I made a copy of my art journal page and with the Helmar Decoupage and Craft Paste I spread it on the back of the fussy cut girl and on the painted canvas.


 Using the paint and glue spreader I smoothed out all the bubbles.


I am happy that I can now hang this on my wall and see it and it's not only in my art journal. Now I am looking at what else I have in my art journals that I might like to copy and pop on my wall.

Linking this up with Paint Party Friday and off to see what you have all been up to this week.

Have a great day
Vicki-Ann :)

Saturday, February 20, 2016

Flowers are the music of the earth...

It's summer here in Australia and the flowers in my garden are so pretty, so I took my canvas outside to take my photo's and send you a bit of sunshine. I was told recently by a lovely lady called Yvonne, that I should put more of my art on canvas's and that it was a shame to keep my art all in journals and not pop some on canvas to give away or display.


If you would like to see step by step details on how I did this Canvas.  I go into more details at the Helmar design team page. 

Going to link this up at Paint Party Friday off to pop around and say hi to everyone..


Have a great day
Vicki-Ann :)


Saturday, October 3, 2015

Simplicity and Helmar...


Well its that time again.  Its Helmar Design Team post day..
Today I am sharing a canvas I made. Look at all that wonderful texture. I am using my all time favourite glue for all my sewing collage elements. The wonderful Tack craft glue. 
Want to see more pop over to the Helmar blog and I go into lots of detail with what I used and with more detailed pictures. 
Very exciting news that I have been asked to stay on the Helmar design team for another 6 months, Woohoo.. 

Have a great day.
Vicki-Ann :) 


Sunday, September 6, 2015

Steampunk Canvas...

Happy Fathers Day to all the Dad's in Australia  and New Zealand. 
For this special day I made my husband a Steampunk inspired canvas. He loves trains, cars, gears and anything mechanical.

I used Lindy's sprays on my canvas to get the sparkle and that great grungy brown background colour.  
To get the copper look on my canvas I used Helmars Tacky craft glue and black card stock. I layered the black card stock in an overlapping pattern and then rubbed DecoArt Gold Rush Metallic Lustre onto the card stock with my finger. Making sure not to cover it all up so I get some black showing through. Then I added brads to all the corners so it looked like rivets. 

For the finished steampunk canvas and more details pop over to the 

Teams I design for
Have a great day 
Sandy :)

Tuesday, August 25, 2015

Chunky mini Owl Canvas

I was going to paint a card for  my daughter for her recent birthday and instead I did this 6x6 inch chunky mini canvas. 

It is up on the Helmar blog today, so hope you pop over there
 and see all the details.  

Have a great day
Vicki-Ann :)

Teams I design for